PROTECTING SWIMMERS
Test. Mark. Protect.
Why a Test. Mark. Protect. Policy is Important
What is Test. Mark. Protect?
While every organization’s Test. Mark. Protect. policy may be different depending on your staffing model and unique location, below is a brief explanation of each of the elements and overall best practices.
Test
Swim test to determine swimming ability. Swimmers who do not take the test may be automatically designated as non-swimmers. Below are some examples of skills tested in a swim test:
- Swim the length of the water
- Survival skill
- Self-extraction
- Jumping in
- Use the slide or any other unique features
Mark
Clearly mark all swimmers to identify their swimming ability.
When determining your organization’s marking procedures, it is best to keep it simple. We recommend marking swimmers in green and non-swimmers in red. By only having two options, lifeguards will be able to keep their focus on the water and not spend time tracking and remembering your organization’s policy.
Protect
Most aquatic incidents happen in shallow water (3′-5′). Therefore, restricting non-swimmers to the shallow end is not enough to protect them. That’s why it’s important to add an additional layer of protection. Below are the three different protections we recommend.
- Actively engaged in a swim lesson or activity with staff
- Actively supervised, within arm’s reach of an adult parent, caregiver, or counselor
- Wearing a properly fitted US Coast Guard approved life jacket
Examples of Marking Solutions
Below are examples of common solutions we find organizations use to mark their swimmers and non-swimmers. Whether you use breakaway neck bands, flagging tape, or something else, we would recommend only using two colors to simplify your organization’s policy.


Examples of Life Jacket Organization Systems
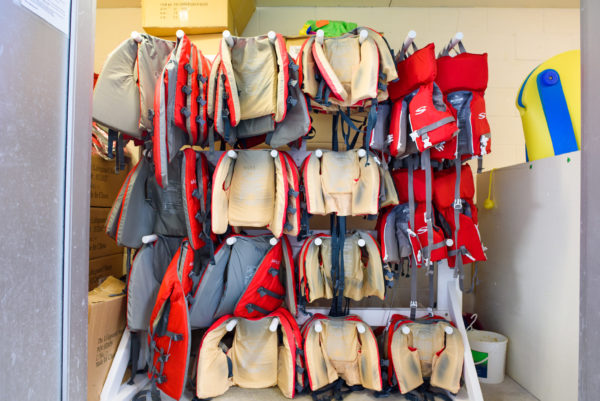
Life jackets are a great way to protect non-swimmers and keep them safe. Below are a few examples of different ways organizations store their life jackets, so that they are easily accessible and neat/organized.


Tips & Tricks for Implementing Test. Mark. Protect.
Below are tips and tricks for implementing a strong Test. Mark. Protect. policy.
Document: For every youth that receives a swim test, document their ability. Set up a system that allows you to track if someone has had a swim test or not so that no swimmer gets left behind.
Utilize Non-Aquatics Staff: If you do not have any extra aquatics staff to implement your policy, train and utilize non-aquatics staff for tasks like administering the swim test, documentation, fitting a non-swimmer into a PFD, communicating with parents, etc.
Swim Test Times: Set specific swim test times throughout the day when you have more staff that are able to help implement your policy or are able to close the pool/waterfront temporarily for swim tests only. If a child arrives at a different time, have them wear a PFD until you are able to test them.
Communication: Communicate with your community (members, adults, parents/guardians, etc.) regularly about your policy and its importance so that the expectation of Test, Mark, Protect is clear. This may be on the website, handbook, or on signage throughout the organization. By being transparent early, parents/guardians will know what to expect when they bring their child to your organization, and ahead of getting into the water.
Natural Water: Even if a swimmer is comfortable in a traditional pool, they may not be as comfortable or confident in natural water. Make sure that all swimmers go through Test. Mark. Protect. before swimming in a natural body of water, even if they have previously been tested in a pool. Many organizations also prefer to require lifejackets for everybody, at all times, in natural bodies of water. (It is especially important during boating or while playing on water toys.)
Steps You Can Take
After reading through “Test, Mark, Protect,” observe your organization’s process from start to finish. Ask yourself the following questions as you observe:
- Am I confident that our Test, Mark, Protect policy is being implemented consistently among lifeguards, locations, programs, camp sessions, etc?
- Am I confident that every swimmer who needed to be swim tested today received a swim test?
- Am I confident that our marking procedures are simple enough that lifeguards can clearly identify non-swimmers?
- Am I confident that all swimmers that need to be protected in the water are?
- How can I better communicate our policy so that we have community buy-in, and everyone understands its importance?
If you are not confident in any of your answers today, make a plan on how and when you will address these gaps.
Key Links & Resources
Test. Mark. Protect: A Guide
Read this resource for additional guidance on implementing a Test. Mark. Protect. policy.
Sample Swim Test Policy
View a sample swim test policy.
Safety Sound Bite: Marking Non-Swimmers
Listen to our Safety Sound Bite where we discuss the implications of using more than 2 colors to mark your non-swimmers, and steps your organization can take to simplify your marking procedures.
In-Service Training: Late Arrival
Download our sample in-service training to use with your guards to walk them through a situation where a child shows up late to programming and misses their swim test.
In-Service Training: Challenging Conversations
Download our sample in-service training to use with your guards to walk them through a situation where a parent/guardian is not complying with your Test. Mark. Protect. policy.
